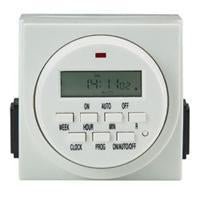

Time Setting:
The correct time of day and day of week must be set prior to using the timer for the first time (in 24-hour format).
- Press "CLOCK" and "HOUR" to set the hour of the day.
- Press "CLOCK" and "MIN" to set minutes.
- Press "CLOCK" and "WEEK" to set the day of the week.
Program Setting:
There are 8 possible program combinations available.
- Press “PROG” to enter program mode. The display will show a “1” and “ON” in the left side of display.
- Press "HOUR", "MIN", and "WEEK" to program the correct day and time the timer should turn on.
- Press "PROG" to set the timer for OFF time and day for 1.
- Press "HOUR", "MIN", and "WEEK" to program the correct day and time the timer should turn off.
- If needed, press "PROG" to advance to the second (2) on/off setting.
- If needed, pressing "R" will cancel the current setting, pressing "R" a second time will undo the change.
Combination Weekly Setting:
While in the "Program Setting" mode above, various combinations of week days may be programmed into the timer.
- Press "WEEK" the display will show: "Mo, Tu, We, Th, Fr, Sa, Su". This setting will activate the timer for all 7 days.
- Press "WEEK" again and the individual day of the week will be shown.
- When "Su" is shown, pressing "WEEK" again will show: "Mo, Tu, We, Th, Fr" only. This allows programming for the work week as shown.
- Press "WEEK" again and the display will show: "Sa, Su". This will allow programming for the weekend. Continuing to press "WEEK" will provide the following additional combinations.
- Press "WEEK" again and every day but "Su" is displayed.
- Press "WEEK" again and "Mo, We, Fr" are displayed.
- Press "WEEK" again and "Tu, Th, Sa" are displayed.
- Press "WEEK" again and "Mo, Tu, We" are displayed.
- Press "WEEK" again and "Th, Fr, Sa" are displayed.
- Press "R" to cancel current setting, press "R" again to undo cancel.
Special Functions:
- Press "WEEK" and "HOUR" simultaneously. The display will show "O" at the right hand side and indicates that the timer is in "RANDOM" on/ off mode and varies the on/off timing from the actual settings from 2 to 32 minutes.
- Press "HOUR" and "MIN" simultaneously. The display will show a clock symbol ".." at the right hand side and the correct time of day will move forward 1 hour to adjust for Daylight Savings Time. Press "HOUR" and "MIN" again to revert correct time of day back to standard time.
- "ON/AUTO/OFF" override. Press "ON/AUTO/OFF" or the button with the "HAND" symbol to force the timer into permanent "ON" "AUTO" program or permanent "OFF" mode.
- The accuracy of the timer is 2 minutes per month.
Starting Timer After Programming:
- When within the programmed window (preset time period), cycle through "ON/AUTO/OFF" button to "ON" mode (indicated by lighted red LED above display), and then "AUTO".
- When outside of the programmed window (preset time period), cycle through "ON/AUTO/OFF" button to "OFF" mode, and then "AUTO".
Blog posts
-
Understanding Color Temperature and Beam Spreads. What's Their Significance for Your Landscape Lighting
Read nowWhen it comes to landscape lighting, the color temperature of the light source can have a significant impact on the overall look and feel of your outdoor space. Color temperature is a measurement of the perceived color of a light...
-
What Are the Benefits of Drip Irrigation Systems?
Read nowDrip irrigation systems are becoming increasingly popular in agriculture due to their many benefits. This article explores the advantages of drip irrigation systems for farmers and the environment. Irrigation is an essential aspect of agriculture, ensuring that crops receive the...
-
Wifi Irrigation Timers: The Ultimate Solution for Smart Irrigation Systems
Read nowDiscover the benefits of using Wifi Irrigation Timers for your smart irrigation system. From saving time and water to improving plant health, this technology is a game-changer for gardeners and farmers alike. Irrigation is an essential component of agriculture and gardening, and...